
In Windows 10 and Windows 11, you can see, hide, remove, and download fonts, and you can even add more by using the popular drag-and-drop method. Here is how
Your Windows PC can contain a vast collection of typefaces that you can utilise to add flair to your presentations, documents, and other files. However, how can one determine which typefaces are accessible, how they will look, and how to obtain new ones?
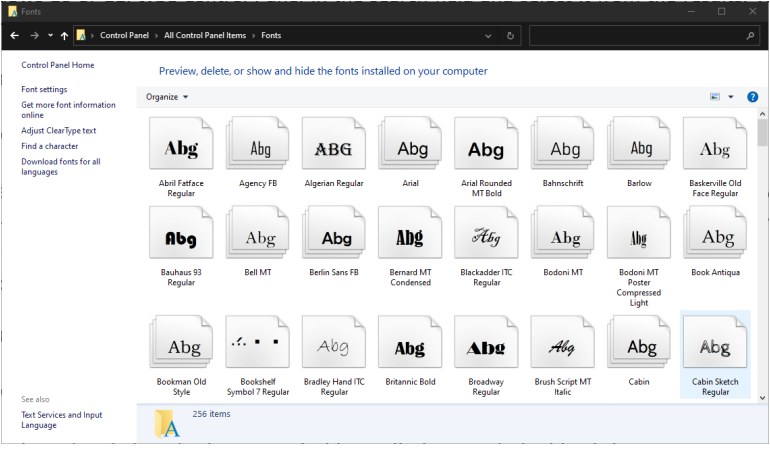
Microsoft provides a few helpful tools for Windows 10 and 11. You may view and print a preview of each typeface and see which fonts are installed using the Control Panel’s Fonts applet. Additionally, you may browse your typefaces and add new ones by dragging and dropping them into the typefaces tool under Settings. In Windows 10 and 11, the Control Panel applet and the Settings tool appear and function identically. Let’s check out both alternatives.
In this blog, you will learn how to quickly view the fonts available on your Windows 10 PC. With easy, step-by-step instructions, you’ll be able to preview and manage these fonts for better design and personalisation of your documents.
How to View Installed Fonts
Go to the Settings Menu: To access the Settings, press the Windows key + I.
Go to Personalization: Choose Personalisation from the Settings window.
Access Fonts: To access the font options, select Fonts from the left sidebar.
Examine the installed fonts: A list of every typeface that is installed on your computer may be found here. To locate a certain font, use the search bar or browse the list
Preview Fonts
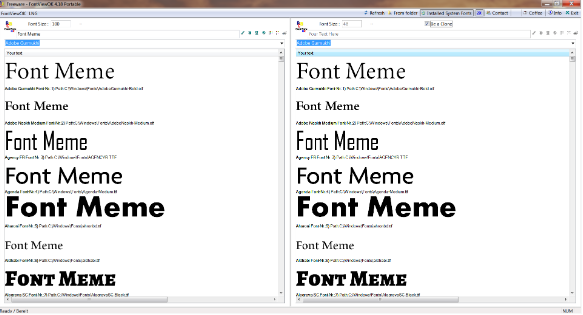
Choose a single font (any font represented by a single page) and either double-click the font or click Preview. (You can also choose Preview by right-clicking on the font.) You can view the font’s appearance in different sizes with the Font Viewer. If you would like to print a tangible copy of that font, you can do so from the font viewer window.
How to Install New Fonts in Windows 10
Installing new fonts on your Windows 10 PC is a simple process that can add a fresh touch to your documents and designs. Here’s a step-by-step guide to help you install fonts easily:

Download Fonts from a Trusted Source
Start by visiting reputable font websites like Google Fonts, DaFont, or FontSquirrel to find fonts that suit your style.
Download the font files, usually in .zip format or directly as .ttf (TrueType Font) or .otf (OpenType Font) files.
Install Fonts via Drag and Drop
Using Settings:
Open Settings (press Windows + I).
Navigate to Personalization > Fonts.
Drag the downloaded font files directly into the Fonts settings window to install them automatically.
Using Control Panel:
Open the Control Panel and go to Appearance and Personalisation > Fonts.
Simply drag the font files into the Fonts folder, and Windows will install them for you.
Installing Fonts from .TTF or .OTF Files
If you’ve downloaded a .ttf or .otf file, simply double-click on the file.
A window will open showing a preview of the font. Click Install at the top left corner of the window to add it to your system.
Ensuring the Fonts Are Installed Properly
After installation, go back to the Fonts section in Settings or Control Panel.
Search for the font name to check if it appears in the list of installed fonts.
You can now use the font in various applications like Microsoft Word, PowerPoint, and other design tools.
By following these steps, you can easily add new fonts to your Windows 10 system and personalize your projects with a wide range of typefaces.
Managing Font Installation in Windows 10
Once you’ve installed new fonts on your Windows 10 PC, it’s important to know how to manage them effectively. Here’s a simple guide on how to manage your font installations:
View Installed Fonts: Use Control Panel or Settings to browse and search for installed fonts.
Remove Fonts: Right-click on the font in Control Panel or Settings and select Delete or Uninstall to remove it.
Hide Fonts: Right-click on a font and select Hide to make it unavailable without deleting it.
Organize Fonts: Create folders within the Fonts folder to group fonts by style, though Windows doesn’t support direct categorization.
Troubleshoot Font Issues: If fonts aren’t displaying correctly, try disabling or reinstalling them.
Tips for Choosing the Right Font for Your Documents
Match the Font to Your Content
Formal Documents: Stick with traditional fonts like Times New Roman or Arial for a professional tone.
Creative Projects: Experiment with decorative fonts like Lobster or Brush Script to add flair.
Tech or Modern Content: Go for sleek, clean fonts like Roboto or Helvetica.
Prioritize Readability
Choose fonts that are easy to read in various sizes.
Avoid overly thin or elaborate fonts for body text to ensure clarity.
Ensure Compatibility
Verify that your chosen font is supported across platforms like Word, Google Docs, or PDF editors.
Use widely available fonts to avoid display issues when sharing documents.
Craft a Harmonious Font Pair
Rule of Contrast: Pair a bold, striking font for titles with a simple, clean font for body text (e.g., Montserrat for headings and Open Sans for text).
Stay Consistent: Use similar font weights or styles (serif with serif, sans-serif with sans-serif) to maintain a cohesive look.
Test and Refine
Preview your document to see how fonts look together.
Adjust spacing, sizes, or styles for balance and alignment.
Troubleshooting Common Font Issues in Windows 10
Having trouble with fonts on Windows 10? Don’t worry! Here’s a quick guide to fix the most common font-related problems:
Fonts Not Showing Up After Installation
Issue: You’ve installed a font, but it’s not appearing in your apps.
Fixes:
Double-check the installation: Right-click the font file and select “Install for all users” to ensure it’s properly added.
Restart your PC: Sometimes a reboot is all it takes to refresh the font library.
Check the font folder: Go to C:WindowsFonts to confirm if the font is installed. If not, reinstall it.
File compatibility: Ensure the font file is in a supported format like TTF, OTF, or FON.
Font Rendering Problems
Issue: Fonts look blurry, jagged, or aren’t displaying correctly.
Fixes:
Adjust ClearType settings:
Type “ClearType” in the Start menu and select Adjust ClearType Text.
-
- Follow the on-screen steps to optimize font clarity.
-
- Update your display drivers: Outdated drivers can cause rendering issues. Check for updates via Device Manager.
-
- Check display resolution: Set your screen to its native resolution for the sharpest font rendering.
-
- Disable scaling: If you’re using scaling, some apps may not render fonts well. Adjust scaling in Display Settings.
System Performance with Multiple Fonts
Issue: Your PC slows down when you’ve installed too many fonts.
Fixes:
Uninstall unused fonts: Go to C:WindowsFonts, right-click unused fonts, and select Delete.
Use a font manager: Tools like FontBase or NexusFont can help organize and activate only the fonts you need.
Limit startup fonts: Too many fonts loading at startup can slow things down. Stick to the essentials.
Create font backups: Save extra fonts in a separate folder and only install the ones you use often.
With these solutions, you can resolve font problems and keep your Windows 10 experience smooth and visually pleasing!
Final Thoughts
Finding out which fonts Windows 10 is using is easier than you might think! By simply accessing the Fonts folder through the Control Panel, you can quickly see all the fonts installed on your system. This helps you understand what fonts are available for your projects, whether you’re creating documents or customizing your apps.
With this knowledge in hand, you can also troubleshoot font issues, manage your font library more efficiently, and ensure everything looks polished. Knowing how to locate and manage fonts in Windows 10 empowers you to make the most of your system’s design capabilities with minimal effort. Happy font hunting