
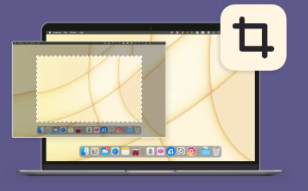

It’s quick and very helpful to take a screenshot on your Mac, whether you’re preserving a webpage, a conversation, or just something important. However, what happens if you don’t require the full screenshot? The best course of action is usually to crop it to highlight a certain area or get rid of extraneous elements.
Now, “What if I don’t have a photo editing tool on my Mac?” is probably on your mind. Relax! We’ll demonstrate how to take a screenshot on your Mac and crop it with ease in this tutorial; no complex software is needed. Let’s jump right in and make things easier!

How to Take a screenshot on Mac
Before we learn How do you crop a screenshot on a Mac, let’s start with the basics of taking a screenshot and some keyboard shortcuts can make your screenshot experience smooth and efficient.
To capture your entire screen, simply press Command + Shift + 3. This will take a full-screen screenshot and save it to your desktop.
If you want to capture a specific area, press Command + Shift + 4. Your cursor will change to a crosshair, allowing you to click and drag to select the area you want to screenshot.
Need to capture just a specific window? No problem! Press Command + Shift + 4, then hit the Spacebar. Your cursor will turn into a camera icon, and you can click the window you want to capture.
Whether you’re capturing full-screen screenshots or cropping an existing image to highlight specific details, this guide has you covered.
How to crop a screenshot with Mac’s editor
On your Mac, cropping a screenshot is easy and doesn’t involve any additional software. Here is a step-by-step guide on doing it:
- Open the Screenshot
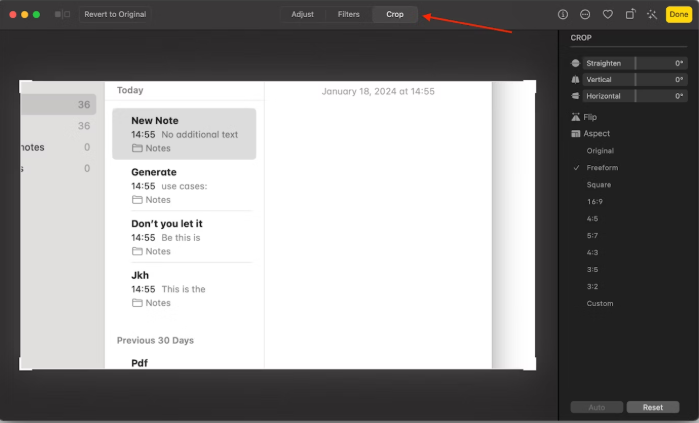
Double-click on your screenshot to open it in Preview. The Markup Toolbar should appear automatically. If it doesn’t, click the Show Markup Toolbar button (the pencil icon).

- Access the Crop Tool
In the toolbar, click the ” Crop ” button. This will allow you to adjust the visible area of the image. - Adjust the Crop Box
Click and drag the corners or edges of the crop box to select the area you want to keep. You can also reposition the box by dragging it to your desired location. - Apply the Crop
Once you’re satisfied with the selection, click Done in the bottom-right corner. - Save Your Cropped Screenshot
Save your updated screenshot by clicking File in the menu bar and selecting Save, or simply press Command + S on your keyboard.
where are the screenshots saved on mac
By default, screenshots on a Mac are saved to your Desktop with filenames starting as “Screenshot” followed by the date and time. You can also check your Downloads folder or Clipboard if you’ve customized the settings.
How to crop a screenshot on a Mac with the Photos app
The Photos app on Mac is a great built-in tool for cropping screenshots. Here’s how to do it:
- Open the Screenshot in Photos
Right-click (or two-finger click) the screenshot, then select Open With > Photos. If Photos isn’t listed, choose Open With > Other, navigate to Applications, and open Photos. - Start Editing
Once the screenshot opens in Photos, click the Edit button at the top. - Crop the Screenshot
Go to the Crop tab. Adjust the crop box manually to select your desired area, or choose a predefined aspect ratio for precise cropping.
- Save Your Changes
Click Done to apply the crop and save your edited screenshot.
For freehand cropping or custom shapes, apps like Capto can be a great alternative!
How to crop a Mac screenshot with the Preview app
If Photos isn’t your preferred tool, you can use Preview, another built-in Mac app, to crop your screenshot effortlessly. Here’s how:
- Open Your Screenshot in Preview
Simply double-click on your screenshot file, and it will open in the Preview app by default. - Activate Editing Tools
Click the pencil icon (Markup Toolbar) located in the top-right corner of the Preview window. - Select the Crop Area
Use your cursor to click and drag over the area of the screenshot you want to keep. Once selected, the crop icon will appear on the toolbar.

- Crop Your Image
Click the crop icon to finalize the selection and snip your image to the chosen area.
And that’s it—your screenshot is now cropped and ready to use!eatly cropped and ready to use!
How to crop a screenshot on Mac after saving
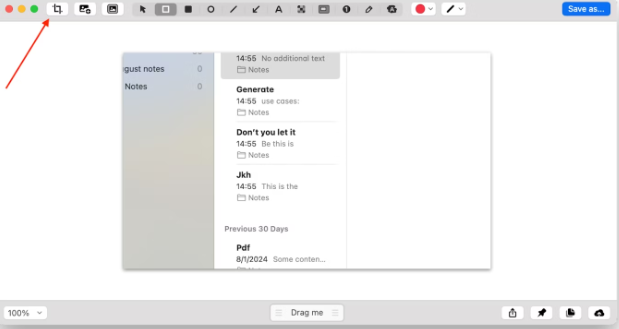
If you’ve already saved your screenshot and want to crop it, you can easily use built-in tools like Photos or Preview, or third-party apps like Capto or CleanShot X. Here’s how to crop your screenshot using CleanShot X:
- Open Your Screenshot
Click on the CleanShot X icon in your menu bar and select Open. In the pop-up window, navigate to the location where your screenshot is saved (usually the Desktop) and double-click the file to open it.
- Crop the Screenshot
Click the Crop icon in the top-right corner of the CleanShot X window. - Adjust and Save
Drag the edges to adjust your crop area, then click Crop > Save As to save your cropped screenshot.
If you’re dealing with a lot of screenshots and need to organize them, PhotoBulk is a great tool for quickly resizing, renaming, and watermarking multiple images at once.
How to Crop Your Screenshot Using Online Tools
Now that we’ve explored how to crop screenshots on your Mac, let’s take a look at an easy-to-use online tool for cropping images directly in your browser.
For a quick and hassle-free solution, you can visit sites that offer free image cropping tools, such as iloveimg.com. These tools don’t require registration and allow you to crop your screenshot in just a few clicks. Simply upload your image, adjust the crop area, and save the result!

Keyboard Shortcuts for Taking Screenshots on Mac
- Command + Shift + 3 — Capture the entire screen
- Command + Shift + 4 — Capture a selected area (cropped screenshot)
- Command + Shift + 4, then Space, then Enter — Capture a screenshot of the active window
- Command + Shift + 5 — Record a portion or the entire screen


Thanks for uploading this valuable content
Pingback: How to find out the fonts windows 10 is using - techwiva